Showing posts with label sewing. Show all posts

Tuesday, September 8, 2020

Making a 1950s Dress – Simplicity 4270 (Another One!)

During my summer vacation, I made another dress with the pattern Simplicity 4270 (see the first one I did here). It's such a beautiful design and I'd always wanted to make a second one in a colourway similar to the one on the pattern cover once I'd find the right fabric. Well, a couple of weeks ago, I came across this fabric that was on sale and I loved the colour and the subtle embroidered pattern.

Fabric and notions purchased

Close up to see the embroidery

I had forgotten the number of pieces you have to cut to make this dress—a lot.


This post will be pretty straightforward. I'll mostly mention tips and tricks discovered while working on this project that I find relevant for future reference when making this dress or another one.


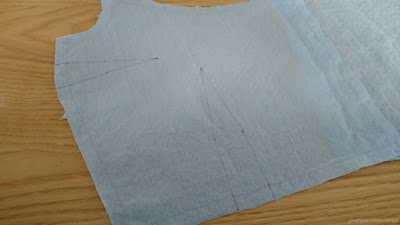
Bodice dart marks


This time, I made x's instead of full circles to mark the darts.
It's faster and I believe it's less likely to pierce the fabric or get see-through.

I realized too late that I had this bad habit of making marks too heavy with the pencil. In fact, on my first version of this dress, the right dart at the bust started to show some pencil with wear, though it's washable.

After making a zigzag stitch on the raw edge of the lower sleeve (white piece),
I simply sewed it to the upper sleeve (blue piece) instead of making a slip-stitch like last time.

Close up of the lower sleeve sewed


Yoke and facing seams


Joining the facing to the yoke (both are two same pieces, they're just called differently)

To ensure that the facing seams are aligned with the yoke seams, first pin where the seams meet (as pictured above), then pin the rest of the facing to the collar, easing where needed.

Result


Bodice rickrack


When sewing the rickrack, always place it a little above the seam line on the piece that's thicker. (In this case, the white piece is thicker than the blue one as shown above). Because the sewing needle tends to push the rickrack down, putting it a little above assures that when the rickrack is pushed, it arrives right on the seam line and not too low (thus leaving an ugly blue space between the white yoke and the blue fabric).


Completion of the bodice


Bodice done

The edges of the bodice aren't straight which made it difficult to sew the flaps right. After hesitating to sew following the vertical lines on the fabric versus the curving of the edges, I chose the former. I didn't encounter any problems subsequently, so I'm satisfied with my decision.

The edges

I would've folded more white fabric on the front left edge, but couldn't because then I would've had to fold a lot of blue fabric on that same edge. This would've made the bodice tighter while I felt that it was already rather tight. Eventually, when I tried on the dress with the zipper, I realized that I had been worried for nothing. The bodice has plenty of space.

Apart from this, the edges aren't the same width. It's the same thing with my previous dress, so if I make this design again, I should really make the yoke and facing longer to avoid such unexpected troubles.


Making the skirt pleats


This one isn't really a trick... just to mention that I followed the width of the pleats on the pattern piece, but regretted it instantly when I put the skirt under the bodice. I had been hesitating right at the beginning but still went for it because I was so unsure which width to choose.

So I went back to 0.25" pleats.

Yay done

After being done with the pleats, I trimmed the excess fabric which finally gave me a reference for the ideal width of a skirt with 0.25" pleats for my waist size.

Here's the extra fabric I removed after making the pleats—one whole skirt section
(There were three skirt sections in total.)

Close up

The fabric pulled out looks a bit less than the pattern piece, but I also removed two seam allowances of 5/8" each (not pictured), so it does come down to one whole skirt section withdrawn.

In sum, I have to cut two pieces of fabric with this skirt pattern if I want to make 0.25" pleats. (Ease is included in this.)


Attaching the skirt to the bodice


For my previous dress, I had made a skirt band before attaching the skirt to the bodice. Although the skirt was easier to manipulate with a skirt band, it made everything thicker which isn't that good. So this time, I only made a zigzag stitch on the skirt's ruffled edge and it was as simple attaching the skirt to the bodice and easing it.


I, however, lacked rigour when easing the skirt to the bodice.

Okay, the side seams don't match here (I tried but it wasn't enough).
I really didn't want to fix it so I just let it be.

The next defect, even worse, is that the seam doesn't align at the zipper. The same has happened for all of my other zipped dresses and I never thought this was a big issue because I always wore a belt, but it gets tiring to have something squeezing your waist and I would've liked the option of wearing the dress without a belt and this flaw.


Dress hem and other finishes


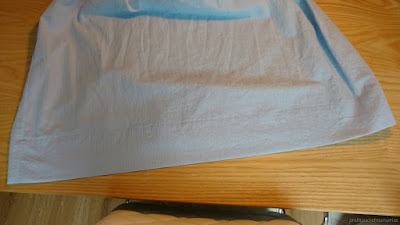
Although always instructed by the pattern, I never slip stitched the hem of my dresses. I'd only make a straight stitch all around. The stitch was never very visible, so I didn't see the relevance of using a more time-consuming method. Not sure if it's because of the colour of the thread, or the fact that I was making a dress in a solid colour for the first time, but the straight stitch was extremely visible on this dress, and it was very ugly.

The fact that I chose a large width for the hem makes it look even uglier.

I thus turned to slip stitching. I thought that I'd need to slip stitch by hand, but when looking for tutorials on YouTube, I discovered other videos explaining how to make a blind hem on your sewing machine. Thinking that it would be simple and way faster than by hand, I looked into these.
Completing the hem actually took me the whole afternoon. I kept unsewing and sewing again because some parts looked horrible even after trying to fix them by hand.

The part on the right looks awful. There were too many spots like this
throughout the hem so it was just easier to start everything over.

After restarting again a couple of times, I managed to get an acceptable result. I ran out of thread on my bobbin near the end so I had to restart from that point, but it doesn't look too visible.

You can see in the below picture that the needle didn't catch the fabric in some parts, but this hem will definitely do. It's at least much better than the hem with the straight stitch.


After the hem, there were the flower buttons left to sew which my mom did. I seem to have developed a reluctance for hand stitching, but I looked into my sewing machine manual and there's a way to sew buttons with your machine...! I need to look into that next time.

Here's the dress finished ✨


Wasn't posing so sorry for my hand, but you can see the dress better without the blinding sun.
Something that annoys me is the bust darts that are loose/stick out.

Not sure if it's the lighting or the dress really is see-through.
I'll wear a slip from now on.


Improvements with regards to the first version


Despite the flaws, this dress clearly shows improvement from the first dress I made with this pattern. Here are a couple of mistakes I made in the first version that I didn't repeat in the second:

First version: Both sleeves have a weird hole in the hollow of the aisle.

Second version: Both sleeves look normal and are aligned.

First version: Seams aren't finished and buttonholes don't have interfacing.

First version: The facing (slip stitched) has some parts clipped which don't give a nice result.
Also, the yoke seams don't align with the facing seams (not pictured).

Second version: Seams are better finished, buttonholes have interfacing and yoke seams
align with facing seams. However, I forgot to put interfacing between the yoke and facing.

First version: Zipper doesn't have interfacing.

Second version: Zipper has interfacing.

Tuesday, September 1, 2020

Making a 1960s Dress – McCall's 6146

I found this pattern on sale on Etsy back in May and I couldn't pass up the opportunity. Although the design is simple, I liked it and thought I could always use it as a base to make a more elaborate dress.
This was the first time I was using a pattern from McCall's, but I didn't see a notable difference from a Simplicity pattern.

Fabric and notions bought. I'm making View A which is the green dress.


Bodice


The bodice went pretty well. I don't have a lot to talk about except for the rickrack on the neckline and the sleeves.


The instructions told to sew the rickrack and the facing at the same time, as in the picture above... Two seconds in and I knew it'd be impossible to sew both pieces while aiming right in the middle of the rickrack. So I turned to the method used when putting on the rickrack on the dress Simplicity 4270.

First, I sewed the facing as pictured, then flipped it and stitched the rickrack on the seam line.

Just needed to press the facing towards the inside and the rickrack was done.

And now for the sleeves. When I realized that I could've used the same method to put the rickrack on the hems, I had already folded them on the inside and sewed them (thus couldn't place the rickrack on the pressed fold). I didn't want to unsew both hems, so I tried different combos (side of the fabric + superposition of the rickrack) to find the best one to stitch the rickrack.


It took a few tries to find which combination gave the best result (see picture above). Of course, for the next time I sew rickrack on the sleeves, I'll sew it on a fold I'll have pressed beforehand.

Bodice done ✨ Absolutely love the rickrack that adds simple detailing
(Note: The sleeves were sewed at 3/4" instead of 5/8".)


Skirt


The skirt was supposed to be gathered, but because of my last gathering experience with this kind of fabric, I knew I didn't want to gather this one. However, I wasn't sure what to replace the gathers with and had been pondering over what to do since the beginning of the project.

I got inspired by vintage dresses on Etsy and settled on narrow pleats of 1.5 cm wide. I followed instructions on how to make a pleated skirt on wikiHow. According to the article, if I wanted 1.5 cm pleats, I had to mark my fabric every 3 cm and then fold.
I must've done something wrong because the method described didn't work for me. I never understood what I had done wrong exactly, but when I folded the pleats, I wouldn't have 1.5 cm pleats.
There was a gif at Creating the Pleats presenting how to fold them, but it only showed one pleat being folded and it wasn't very clear to me. I didn't understand the following gif either (though now I do get it—only too late).

Otherwise, I had found that when I folded pleats on 1.5 cm marks, it really gave me 1.5 cm pleats, so I just made marks every 1.5 cm instead of every 3 cm.

Marking the pleats and then folding them

It's a very large skirt (the amount of gathering would've been huge!), so I was lucky to be able to wrap it fully around my waist with only half of the skirt pleated.

I wasn't quite satisfied with the pleats after stitching them...

They were notably thin. It looked all wobbly.

Something had evidently gone wrong, so I decided to unsew all of the pleats and moved on to another strategy. I found this blog post on making pleats and the explanation was interesting. At that time, I had decided to make even more narrow pleats of 0.25".
The calculations in the blog post didn't work for me (the total length of fabric I would've needed with a 25" waist was 37.5"...), but I had found the drawing of the pleats extremely helpful. It made me understand the concept of these kinds of pleats, which is that one pleat is three layers thick. No wonder why my first set looked all flimsy—the pleats' layers were all irregular.

So I decided to make 0.25" pleats, making sure to take three layers of fabric for each pleat.

I could sense this would take long...

Finally! I made more folds than needed, just to be safer.

The process was tiresome, but it went well. I decided to ditch any calculations for now and adjust the waist later when the skirt would be attached to the bodice. I thought it would be easy to just remove the excess pleats at the end, but with a skirt band added later on, it wasn't that easy.

The pleats stitched

These pleats also seem to be standing on only one layer of fabric,
but they're in fact stitched on three layers.

Looking back, I'm not sure whether ignoring my waist measurements while pleating the skirt was the best idea, because I ended up with a lot of altering to do for the bodice and the skirt at the same time.
I think I should've first determined how tight I wanted the bodice to be, make the skirt pleats and calculate the waist basing myself on the bodice measurements specified beforehand, and finally, join the skirt to the bodice.

I tried to attach the skirt to the bodice, but the pleats were making the whole thing unstable, so as instructed, I made a skirt band.


The skirt band made the process a wee bit longer, but it was worth it.
It was much easier to pin the skirt to the bodice.

It also made it easier to ease the skirt.

After joining the skirt to the bodice, the fun began. I had to sew the zipper, but first, I had to know how much I'd need to remove at the bodice and the skirt.

Everything at the pin's right is much fabric I have to remove for both edges at the bodice

I pressed each edge of the bodice according to the pin's position, tried the bodice back on, and I don't know what kind of witchcraft occurred, but it was way too tight; as if I'd actually only need to press 5/8" from the edges instead of something like 3".
I'm not sure how I managed to measure the bodice so differently from the first to the second time. I just know that it's hard to measure yourself properly at the back, especially when you want to make the bodice tight. Again, I think measuring the bodice and the skirt separately would've been preferable, but it was too late when I acknowledged it.

Anyway, I cut the extra fabric at each side of the bodice according to this 5/8" measurement and adjusted the skirt consequently.

Look at all that extra fabric at each side of the skirt...

Cutting all excess took quite a while because there was the skirt band covering the pleats, but I was mostly happy to finally remove this big bulk of fabric and not having to carry it around anymore.

The two unpleated parts on each side of the skirt are for the zipper.

Then I pinned the zipper and tried the dress on. However, it was too loose. What the heck. (◴◡◶) So I repinned the zipper and tried the dress three times until I got the right measurements on the fourth. Guess how much extra fabric I had removed at the bodice? Pretty much the same amount as when I had pinned it the first time... Ugh, I had basically come back to square one after taking a longer path.

Anyway, I proceeded to sew the zipper, and when trying to zip it up, it went berserk and a bubble formed while I was zipping up the waist. I think it was because of the thickness of the fabric there and how close it was sewed to the zipper teeth—though it worked fine when it was pinned only.
My mom tried to help me get the zipper back to normal, but to no avail. We finally had to remove the zipper and it became broken. So I had busted the zipper and had way too much fabric at the bodice and the skirt... noice.

Two days later, I tackled the zipper a second time with a navy blue one of better quality (the fabric store we went to was a different one and didn't have any dark red zippers.)
Instead of establishing the zipper position by myself, I asked my mom to pin the back of my bodice and waist. I just wanted the job to be well-done this time.


You can see in the picture below how much fabric I folded from the edges. It varies a lot; I folded a lot at the bust but barely at the waist. Also, flunking my first zipper was perhaps a good thing because I had forgotten to put interfacing the first time.


After sewing the zipper, I was relieved to see it worked correctly. I only had to stitch it a second time, nearer to the zipper teeth because the navy colour of the zipper showed a lot when the dress was worn. It shows less now, though you can see a bit of black interfacing if you come near... oops.

Once the zipper was done, my mom helped me make the hem of the skirt, closed the little hole at the bottom of the zipper—that little spot the sewing machine can't access—and sewed a hook-and-eye closure at the top back of the dress.

Then the dress was finished. (•̀ᴗ•́)و Well, almost... there was the belt that was left to make. The pattern piece for the belt was included and I had even cut the fabric, but my mom and I thought that a navy belt would look better, so we decided to look for one.

Here's the dress completed:


Just thought I'd expose some imperfections...

I tightened the bust so much that the middle of the neckline doesn't stay flat. It lifts up a bit.
I did make the bust tight on purpose, but I didn't expect the neckline to do this weird thing.

The thread at the seam of the sleeves' hem is bunched up and the rickrack looks worn out.

The edges of the bodice don't align... thankfully there'll be a belt.
At the left, you can also see a patch that my mom added after accidentally
poking a hole with the seam zipper when unsewing the zipper.

Besides these flaws, I'm satisfied with this dress. And while shopping, my mom found at Ardene the perfect dark red belt to go with it. It's even prettier than a navy blue one.


My conclusions following this project:
  • I'm never doing a back zipper again on a tight dress (except for justified reasons), not only because they're harder to zip up, but also because taking the measurements back there was impossible for me.
  • I'll try to define the measurements of the skirt waist before joining it to the bodice, otherwise, I'm in it for the long haul.
  • I insisted on making the dress very tight at the bust, but in retrospect, I should've left more ease at the underarms to allow my arms to raise comfortably.
Apart from this, I absolutely love the pleats and am glad that I decided to remake them. They were worth the time and I'll definitely do 0.25" pleats again in the future.