During my summer vacation, I made another dress with the pattern Simplicity 4270 (see the first one I did here). It's such a beautiful design and I'd always wanted to make a second one in a colourway similar to the one on the pattern cover once I'd find the right fabric. Well, a couple of weeks ago, I came across this fabric that was on sale and I loved the colour and the subtle embroidered pattern.
Fabric and notions purchased
Close up to see the embroidery
I had forgotten the number of pieces you have to cut to make this dress—a lot.
This post will be pretty straightforward. I'll mostly mention tips and tricks discovered while working on this project that I find relevant for future reference when making this dress or another one.
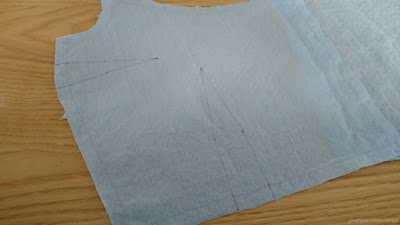
Bodice dart marks
This time, I made x's instead of full circles to mark the darts.
It's faster and I believe it's less likely to pierce the fabric or get see-through.
I realized too late that I had this bad habit of making marks too heavy with the pencil. In fact, on my first version of this dress, the right dart at the bust started to show some pencil with wear, though it's washable.
After making a zigzag stitch on the raw edge of the lower sleeve (white piece),
I simply sewed it to the upper sleeve (blue piece) instead of making a slip-stitch like last time.
Close up of the lower sleeve sewed
Yoke and facing seams
Joining the facing to the yoke (both are two same pieces, they're just called differently)
To ensure that the facing seams are aligned with the yoke seams, first pin where the seams meet (as pictured above), then pin the rest of the facing to the collar, easing where needed.
Result
Bodice rickrack
When sewing the rickrack, always place it a little above the seam line on the piece that's thicker. (In this case, the white piece is thicker than the blue one as shown above). Because the sewing needle tends to push the rickrack down, putting it a little above assures that when the rickrack is pushed, it arrives right on the seam line and not too low (thus leaving an ugly blue space between the white yoke and the blue fabric).
Completion of the bodice
Bodice done
The edges of the bodice aren't straight which made it difficult to sew the flaps right. After hesitating to sew following the vertical lines on the fabric versus the curving of the edges, I chose the former. I didn't encounter any problems subsequently, so I'm satisfied with my decision.
The edges
I would've folded more white fabric on the front left edge, but couldn't because then I would've had to fold a lot of blue fabric on that same edge. This would've made the bodice tighter while I felt that it was already rather tight. Eventually, when I tried on the dress with the zipper, I realized that I had been worried for nothing. The bodice has plenty of space.
Apart from this, the edges aren't the same width. It's the same thing with my previous dress, so if I make this design again, I should really make the yoke and facing longer to avoid such unexpected troubles.
Making the skirt pleats
This one isn't really a trick... just to mention that I followed the width of the pleats on the pattern piece, but regretted it instantly when I put the skirt under the bodice. I had been hesitating right at the beginning but still went for it because I was so unsure which width to choose.
So I went back to 0.25" pleats.
Yay done
After being done with the pleats, I trimmed the excess fabric which finally gave me a reference for the ideal width of a skirt with 0.25" pleats for my waist size.
Here's the extra fabric I removed after making the pleats—one whole skirt section
(There were three skirt sections in total.)
Close up
The fabric pulled out looks a bit less than the pattern piece, but I also removed two seam allowances of 5/8" each (not pictured), so it does come down to one whole skirt section withdrawn.
In sum, I have to cut two pieces of fabric with this skirt pattern if I want to make 0.25" pleats. (Ease is included in this.)
Attaching the skirt to the bodice
For my previous dress, I had made a skirt band before attaching the skirt to the bodice. Although the skirt was easier to manipulate with a skirt band, it made everything thicker which isn't that good. So this time, I only made a zigzag stitch on the skirt's ruffled edge and it was as simple attaching the skirt to the bodice and easing it.
I, however, lacked rigour when easing the skirt to the bodice.
Okay, the side seams don't match here (I tried but it wasn't enough).
I really didn't want to fix it so I just let it be.
The next defect, even worse, is that the seam doesn't align at the zipper. The same has happened for all of my other zipped dresses and I never thought this was a big issue because I always wore a belt, but it gets tiring to have something squeezing your waist and I would've liked the option of wearing the dress without a belt and this flaw.
Dress hem and other finishes
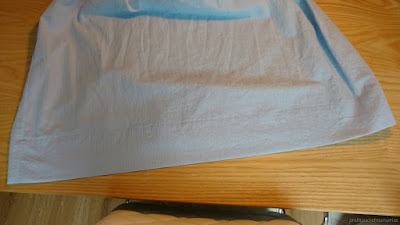
Although always instructed by the pattern, I never slip stitched the hem of my dresses. I'd only make a straight stitch all around. The stitch was never very visible, so I didn't see the relevance of using a more time-consuming method. Not sure if it's because of the colour of the thread, or the fact that I was making a dress in a solid colour for the first time, but the straight stitch was extremely visible on this dress, and it was very ugly.
The fact that I chose a large width for the hem makes it look even uglier.
I thus turned to slip stitching. I thought that I'd need to slip stitch by hand, but when looking for tutorials on YouTube, I discovered other videos explaining how to make a blind hem on your sewing machine. Thinking that it would be simple and way faster than by hand, I looked into these.
Completing the hem actually took me the whole afternoon. I kept unsewing and sewing again because some parts looked horrible even after trying to fix them by hand.
The part on the right looks awful. There were too many spots like this
throughout the hem so it was just easier to start everything over.
After restarting again a couple of times, I managed to get an acceptable result. I ran out of thread on my bobbin near the end so I had to restart from that point, but it doesn't look too visible.
You can see in the below picture that the needle didn't catch the fabric in some parts, but this hem will definitely do. It's at least much better than the hem with the straight stitch.
After the hem, there were the flower buttons left to sew which my mom did. I seem to have developed a reluctance for hand stitching, but I looked into my sewing machine manual and there's a way to sew buttons with your machine...! I need to look into that next time.
Here's the dress finished ✨
Wasn't posing so sorry for my hand, but you can see the dress better without the blinding sun.
Something that annoys me is the bust darts that are loose/stick out.
Not sure if it's the lighting or the dress really is see-through.
I'll wear a slip from now on.
Improvements with regards to the first version
Despite the flaws, this dress clearly shows improvement from the first dress I made with this pattern. Here are a couple of mistakes I made in the first version that I didn't repeat in the second:
First version: Both sleeves have a weird hole in the hollow of the aisle.
Second version: Both sleeves look normal and are aligned.
First version: Seams aren't finished and buttonholes don't have interfacing.
First version: The facing (slip stitched) has some parts clipped which don't give a nice result.
Also, the yoke seams don't align with the facing seams (not pictured).
Second version: Seams are better finished, buttonholes have interfacing and yoke seams
align with facing seams. However, I forgot to put interfacing between the yoke and facing.
First version: Zipper doesn't have interfacing.
Second version: Zipper has interfacing.


No comments:
Post a Comment