
I was supposed to order a handbag a couple of times, but I always choked last minute. I also went shopping for a handbag numerous times, but never found the one I wanted. But here we don't have cute purses so I guess it was game over from the start. I thought of buying a second-hand Japanese purse, but I prefer buying a brand new one.
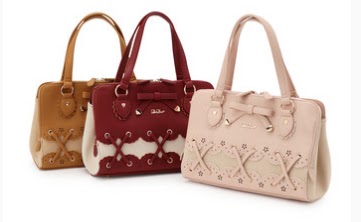
Finally, even though the purses on the websites are cute, I don't feel like spending that much on buying one; I like the lace and bows on them, but all the ones I really wanted (that had fur on them and had the perfect format/shape) are gone.
So I chose to buy a cheaper purse and add my own fur and decorations such as bows and lace on it. I actually got the idea when my mom showed me a faux-fur bolero that belonged to my sister, but she didn't want it anymore. The fur is the exact same color as what I was looking for in a purse. It's beige with some white and brown.


Bought this purse at Walmart. The price was initially $17.97.
I don't think it's worth that price; thankfully I got it for $8.
That being said, I would love in the future to order a Japanese handbag on the internet (or even better would be to travel to Japan and then have an unlimited choice of purses to choose from T▽T). I definitely want to own a real Japanese-brand handbag such as Liz Lisa. If I can eventually graduate and get a real job lol.
Here are other pictures of the purse:  |  |
 |  |
Here are more stuffs I bought to make the purse:

Yes, I ended up buying another same purse for $8.
I'll tally the total cost of the purse at the end of this post.
*for some items here, we already had them, and there are things we did not use.
As you can see from what I bought, I had big expectations on my DIY habilities... basically I imagined myself making criss cross patterns with ribbons everywhere on the front of the purse and make this look all professional like Liz Lisa's handbags. I ended up dropping the idea quickly. This always happens at the beginning. I always bite off more than I can chew.
My mom was supposed to help me, but I realized making this purse also involved a lot of sewing. Thing is, I can't sew at all, I have no idea how to sew on a button. Therefore I would have probably screwed up that purse if I did it myself. So in the end my mom ended up making the whole purse. I have no credit to take for that makeover, although I assisted her during the whole process and did do a couple of basic stuffs here and there. Thank you mom. o( ❛ᴗ❛ )o
- - -
2016.11.02 : Sewing the fur on the front
 |  |
Fur sewed on and straps sewed on. Also on first picture, you see a sewing machine in the background, but we didn't use it because the machine wasn't specialized enough for the purse material. My mom had to hand-sew (the purse is some kind of faux-cheap-leather, but if it was thicker material, we would have had to go see a professional.)
2016.11.03: The sides of the purse
 |  |
Sewing the fur on the sides :

By the way, this is how my mom proceeded for sewing.
First we used parchment paper to draw the patron;

Then the patron was pinned on the fur with needles.
Next the fur was cut (extra contour was left around patron to have more fabric.)
 |  |
With fur sewed on the sides.
The eyelets:
We needed to perforate eyelets on the sides of the purse for the criss cross ribbons. This was hard to do because you need to be on a flat surface. My father perforated the eyelets and I helped him.
But before, he practiced on the 2nd purse to make sure it worked (especially through fur) :
 |  |
Then onto the real purse...


We accidentaly did a hole on the back of the purse
while perforating an eyelet. (╯︵╰,)
 |  |
Large ribbon vs smaller ribbon. We can't see anything with the small ribbon... ok..
2016.11.04 : Making the bows

Decided there would be one big bow,
with two smaller bows on the sides.
.: FINAL RESULT :.
 |  |
 |  |

Also, we got the idea to use the two other straps of the 2nd purse to cover the hole.
We were lucky the hole we made was aligned right with the "upper" strap. :D
I will calculate here the total cost of this purse (only couting what was ultimately used on the purse):
- Fur : free
- Purse : $8 (x2 = $16)
- 8 mm eyelets : $3.49
- Strong sewing thread : $4.19
- Needles for leather : $1.99
- Ribbons : $1 + $2 = $3
Total : $28.67 CAD (taxes not included)
I hope this post inspired you somehow, thank you for reading ✿
That's not the cheapest DIY, but I love my new purse. \^o^/
And we do have eyelets, sewing thread, needles and ribbons left for future use.
And we do have eyelets, sewing thread, needles and ribbons left for future use.
I hope this post inspired you somehow, thank you for reading ✿